


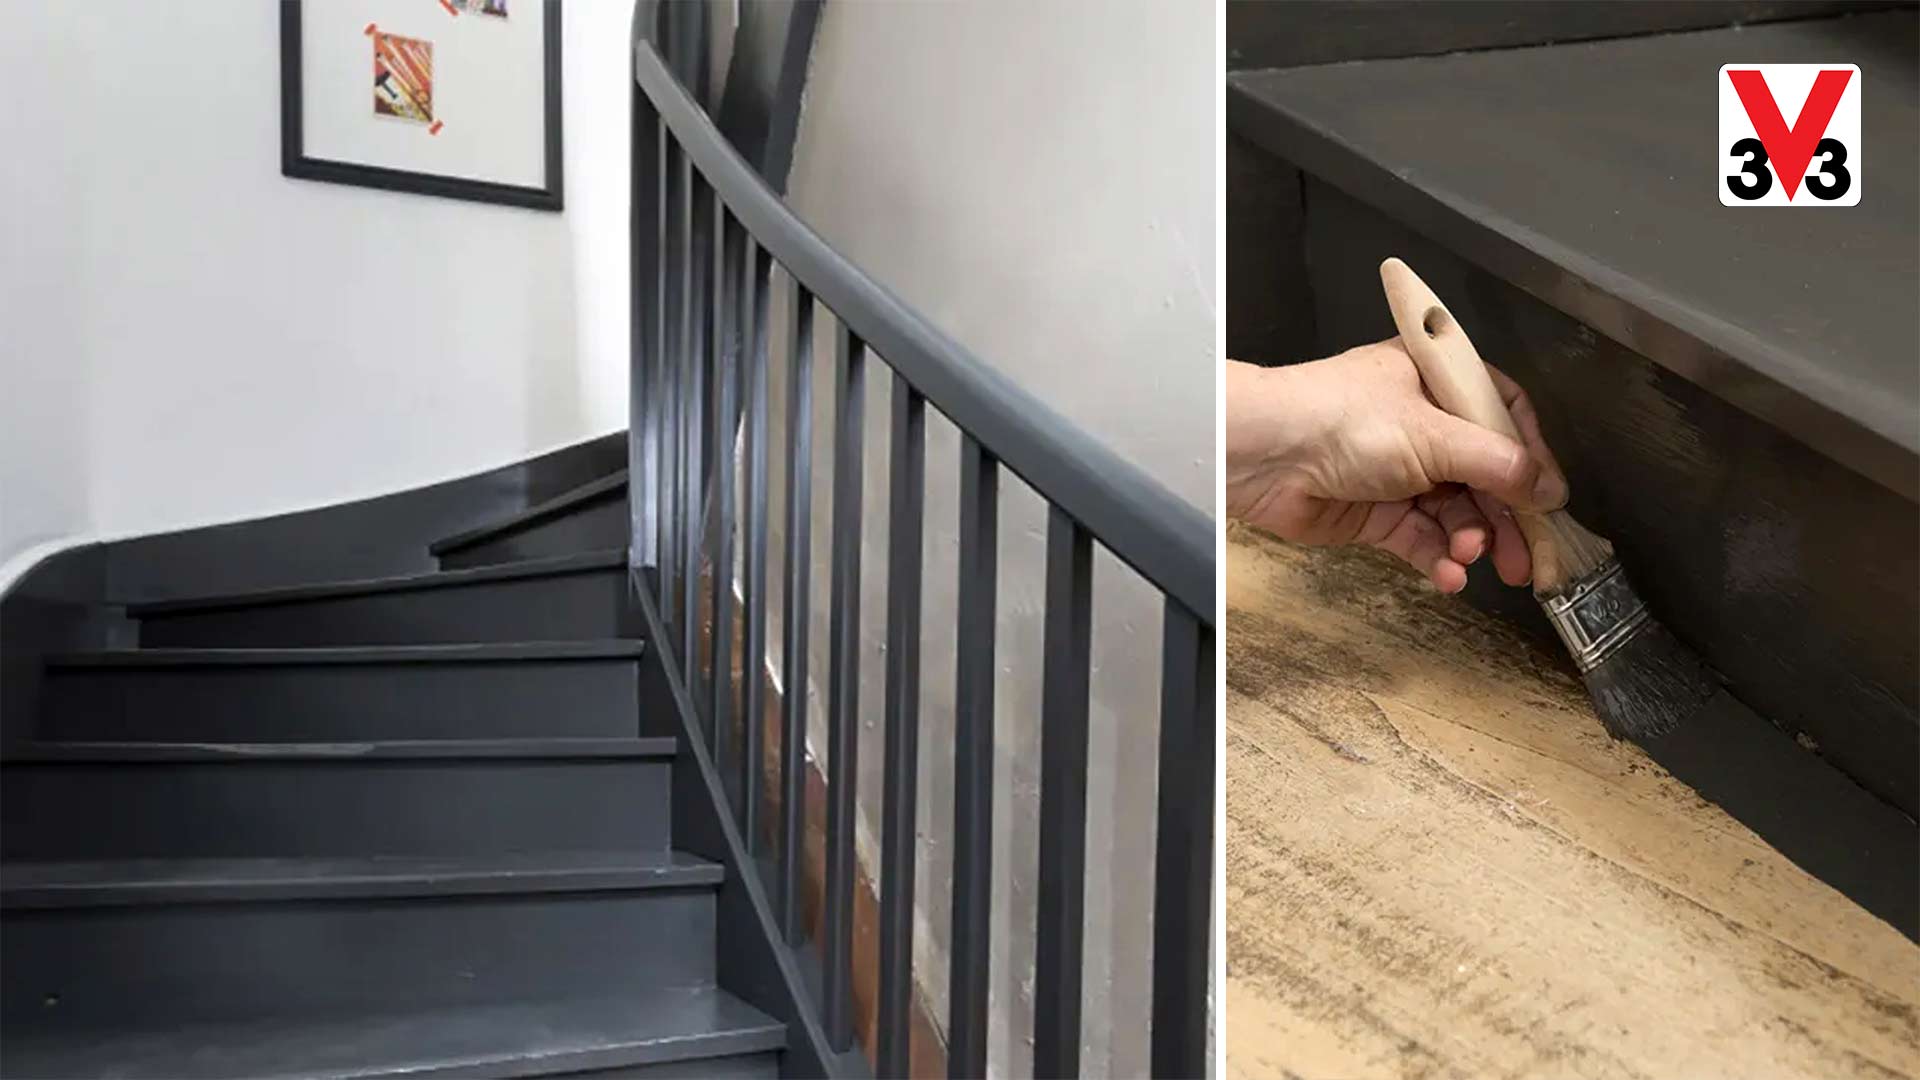
Painting a wooden staircase is a bold decorative choice. If in the past painting a staircase required major work and a long immobilization, Floors & Stairs Renovation Paint by V33 is dedicated to the renovation of wooden stairs. It is available in multiple shades, apply easily and without undercoat.
Step 1: Sand before painting.
Before painting the staircase, brush with a stiff bristle brush to remove any loose varnish or paint. Emphasize the angles of the treads and risers. Remove the crumbly parts with a cloth. As for waxed stairs, degrease using a dewaxing shampoo, then sand in 3 passes of abrasive: 40, 80 then 120. Be careful however, on very old waxed stairs, the wood may be encrusted with wax: the paint will not adhere. not on it. Carry out a preliminary test in case of doubt.

2nd step: Wash your stairs
Wash (using soda crystals) then rinse with clear water the varnished, vitrified, laminated stairs. Be careful not to soak the wood with water.

Step 3: Spruce up your staircase.
Sand (sand with 150 grit paper) each element of the staircase.
Step 4: Dust the corners and moldings
Dust, emphasizing corners and moldings.

Step 5: Apply and smooth masking tape
Apply the masking tape to the wall along the woodwork. Smooth the tape well to avoid paint spills.

Step 6: Before painting, check your support
Before painting the staircase, check the support. If it has stains, nail marks, traces of worn vitrification or is made of very tannic wood, apply a coat of preparation before painting with a brush or long-haired roller. Leave to dry for 2 hours. Shell and dust.

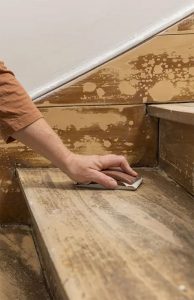
Step 7: Mix the paint
Before application, mix with a wide wand. Start by painting the woodwork (rack, balusters, handrail…). Start with the highest steps of the staircase by clearing the angle of the steps and risers with a brush.

Step 8: Paint the steps with a roller
Paint the steps of your wooden staircase with a small 5mm lacquer roller. Leave to dry for 3 hours.

Step 9: Apply the second coat
Do the same for the second layer. Remove the protective adhesive tapes before the paint has completely dried.


