How many times have you stared at the detached or loose tiles in your bathroom until you finally decided to change them? You don’t have the savings to completely renovate your bathroom?
No problem. Fortunately, the issue can be solved for individual tiles, without needing to change the tiling in your bathroom, and replacing just the detached tiles is considered a relatively easy process. Follow the instructions for a quick, easy, and cheap solution to your problem!
Loose tiles: the source of the problem
Tiles are one of the most common and most durable choices to cover floors and walls, especially for wet spaces like the kitchen and the bathroom, since they’re waterproof and have a high degree of resistance to time and strain. Time, however, can eventually lead to their detaching, something that can create bigger problems if not treated immediately and correctly.
The most common forms of detached tiles are two. In the first, the tile seems to be loose due to expansion. In the second one, the tile is detached without any obvious sign. This can only be perceived as a hollow sound when stepping on the tile surface.
Tiles get loose for many reasons, like intense vibrations, mechanical stresses, or incorrectly applied adhesive. The most common reason, though, is moisture finding its way to the base layer, especially for spaces regularly exposed to moisture, like the bathroom.

Replace your tiles step by step
Replacing one or several of your detached tiles is not a very hard project, and you could do it yourself. Remember to check the whole area around the detached tile, in case you find more problematic spots that you can treat in time. The most effective method is lightly tapping the surrounding tiles with a wooden or metal item.
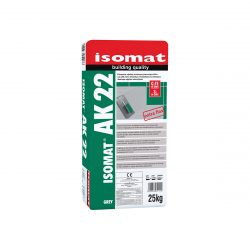
Your result will be much better if you use the appropriate materials. The waterproofing flexible tile adhesive ISOMAT AK 22 and the water-repellent tile grout MUTLIFILL SMALTO 1-8 are the perfect combination for this case. ISOMAT AK 22 is a high-performance, extra-flexible, polymer-modified cement-based tile adhesive with incredible resistance to moisture. It’s used as an adhesive for absorbent and non-absorbent tiles on walls and floors, as well as on surfaces that require high adhesion, flexibility, and waterproofing.
MULTIFILL SMALTO 1-8 is a colored polymer-modified cement-based tile grout. It has high durability, excellent color stability, and high water-repellency. It contains special materials that prevent the growth of bacteria in the joints while it also creates a smooth and glossy finish. It can be used as a tile grout for tiles on walls or floors of any kind, with joint width of 1 to 8 mm.
Now that you know which tiles need to be replaced and you have bought the appropriate materials, let’s see the restoration process step by step.

1st step:
We remove the tile grout around the detached tile. This process is best done with an angle grinder so that we don’t break the neighboring healthy tiles while we remove the problematic ones.
2nd step:
With a spatula, we carefully raise the detached tile, working from the edges towards the center.
3rd step:
We remove the existing adhesive, grout residue, dust, and loose material from the base layer, creating a smooth and clean surface. Especially in cases where the tiles are in wet environments, it’s best we wait a little, so that the moisture that may be trapped in the base layer can be released.
4th step:
We prepare the tile grout ISOMAT AK 22 according to the instructions on the packaging. In order to achieve the correct distance from the neighboring tiles, we must place the appropriate cross spacers between the tiles. Then, with a toothed trowel we spread the adhesive on the base layer and push the tile against it. We can hit it lightly with a mallet or a piece of wood, to push away the air that’s trapped underneath, ensuring that the adhesive spreads and comes into contact with all of the tile’s surface.
5th step:
About 24 hours after the application of the adhesive, it’s time to grout the tiles with the MULTIFILL SMALTO 1-8. Make sure you select the same color as the grout in the rest of your bathroom. We prepare the tile grout according to the instructions on the packaging, we remove the spacers, and we carefully clean the joints. We wet the surface lightly with a wet cloth, making sure to leave no drops. Using a rubber spatula, we fill the joints with the tile grout, with diagonal motions from all directions. When it starts to dry, we clean the surface with a slightly wet sponge, to avoid the deposit of limescale in the joints.
6th step:
After the tile grout is dry, we finally move on to the finish. With a slightly damp cloth, we rub and clean both the tiles as well as the joints.
That’s it! Your surface now looks like new. With this easy and cheap project, no one will be able to see how damaged that surface was, since your work was just like that of a professional!
If, on the other hand, you’re not sure you can do a good work by yourself, ask a professional tile installer for help, which will guarantee a quick and perfect result.


