Do you want to take advantage of your basement and transform it to a comfortable playroom, a private gym, or a neat storage space, but the intense humidity doesn’t allow you to?
The problems created by humidity are a headache for homeowners and tenants alike, while they often seem complicated and hard to solve. Don’t be discouraged! There’s a solution that will relieve you of humidity once and for all, and you’ll be able to use your basement however you want!
The process that we’ll describe below is suggested for both new and old constructions, since we can’t waterproof our basement from the outside.
Tip: If humidity is not obvious but you can still smell mold, try, before you start the process we recommend, to air your space well. The moisture may be created by concentrated water vapors that can’t escape, and good ventilation might solve your problem.
Tools and materials you’ll need:
- Hammer drill
- Brush
- Trowel
- AQUAMAT
- DUROCRET
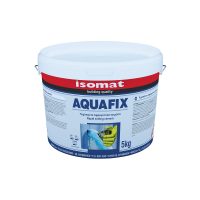
- AQUAFIX
Preparing the surface for internal basement waterproofing
A fundamental requirement for the success of the application, is that the waterproofing is able to be applied to surfaces that can stand against water’s negative pressure; that means the slab and walls of the basement. For that reason, in the case of old constructions, we must first remove plaster or floor coverings (like tiles). It’s certainly a hard process that will discourage some people, but it’s a basic requirement in order to ensure the success of the project, and definitively get rid of humidity.
Then, we diligently clean the base layer so that it’s free of oil residues, dust, loose materials, etc.
Then, we wet the corners where the floor meets the vertical elements (walls, columns) and smooth them with the Polymer-modified, cementitious repair mortar DUROCRET, creating a curving gutter.
In the surrounding walls, we use the hammer drill to drill cones around the joints or any points that the metal support beams are coming out of the wall, to a depth of 3 cm. Then, we plaster them with DUROCRET. With the same material, we plaster any work stoppage joints (after they’ve been drilled lengthwise and in a triangle shape, to a depth of 3 cm), as well as any pockets in the cement. If, during our work, we see points through which water seeps, we seal those places with the ultra rapid-setting leak-plugging mortar AQUAFIX.

Applying the waterproofing layer
We start by wetting the surrounding walls well, and then we apply the waterproofing cement-based slurry AQUAMAT with a brush in two to four layers (depending on the degree of water strain). Every layer must be applied after the previous one is dry. The coating is done in layers of up to 1mm thickness and must be applied up to a height of at least 50 cm over the natural ground level.
Finally, we apply AQUAMAT on the floor of the basement, in two to four layers, in the same manner.
Using AQUAMAT, a uniform waterproofing of your basement’s interior has been created which can then be painted, plastered, or tiled over. The most important thing, though, is that your basement is now free from humidity! You can finally use it as you’d like, adding another useful space to your house, which we’re sure that will become your favorite space soon!


